
How to Restore a Classic Car: Step-by-Step Techniques for Collectors
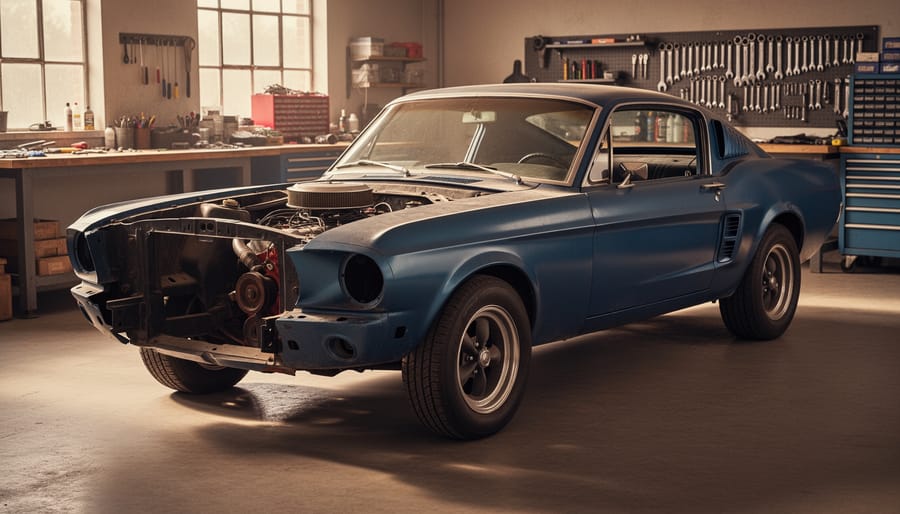
Restoring a classic car transforms a weathered piece of automotive history into a driving masterpiece, but the journey demands 300 to 1,500 hours of work, a methodical approach spanning disassembly to final assembly, and a realistic assessment of your skills, workspace, and budget before you turn the first wrench. The process follows a proven sequence: thorough documentation and teardown, body and frame repair, mechanical rebuilding, and finishing with paint and interior work. Success hinges on patience and attention to detail at every phase.
The allure of bringing a vintage automobile back to life appeals to collectors on multiple levels. There’s the tangible satisfaction of mechanical work, the detective work of sourcing correct parts, and the privilege of preserving automotive heritage for future generations. A 1967 Mustang fastback sitting neglected in a barn carries stories in every rusted panel and seized bolt. Your restoration gives those stories a future.
Before diving in, understand that classic car restoration isn’t a weekend project. Most enthusiasts underestimate both time and cost by half. A frame-off restoration of a mid-century American muscle car typically runs between $40,000 and $100,000 when you factor in parts, materials, and specialty services you can’t perform yourself. That doesn’t account for the value of your own labor.
The good news? You don’t need to be a master craftsman to start. Many successful restorers learn techniques as they progress, beginning with simpler systems and building confidence before tackling complex metalwork or engine rebuilding. What you absolutely need is workspace, basic automotive tools, and the discipline to document everything you disassemble because memory fails when you’re reassembling components eighteen months later.
Assessing Your Classic Car Before You Begin
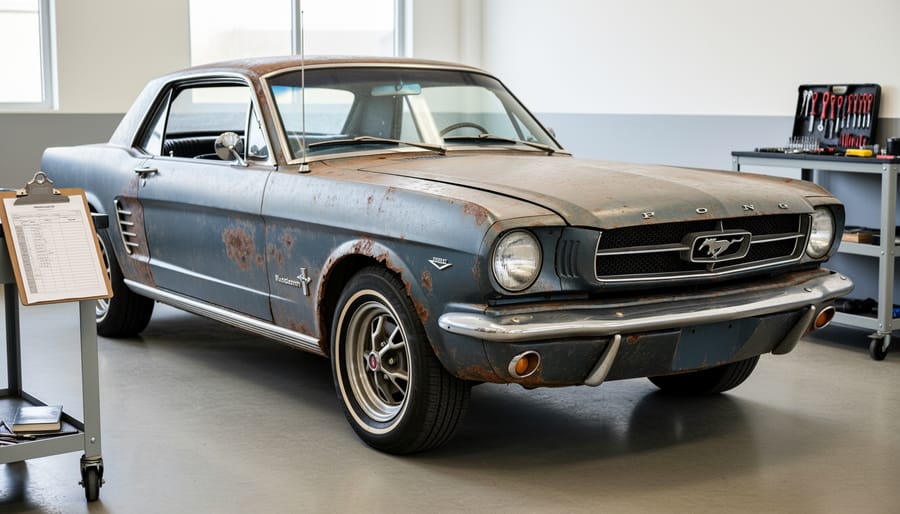
Before you strip a single bolt or dream about paint colors, you need an honest evaluation of what you’re dealing with. A proper assessment saves money, prevents surprises mid-project, and helps you decide whether this car deserves a full restoration or a more modest refurbishment.
Start with the body and frame, where rust is your primary concern. Crawl underneath with a strong light and examine the frame rails, floor pans, rocker panels, and trunk floor. Use a small magnet to detect body filler hiding previous repairs, it won’t stick to plastic filler. Probe suspect areas gently with an awl or screwdriver; if the metal crumbles or the tool punches through easily, you’ve found trouble. Check inside door sills, behind trim pieces, and underneath rubber seals where moisture gets trapped for years.
Document everything systematically. Take wide shots showing the overall condition, then close-ups of every panel, the engine bay, undercarriage, and interior. Note serial numbers from the engine, transmission, and rear axle, these verify whether major components are original or swapped. Photograph existing damage, previous repairs (good and bad), and any unique features or factory markings.
Research the car’s production history using online databases, marque-specific clubs, and factory documentation if available. Understanding original specifications helps you identify non-original parts and decide whether to restore to factory spec or preserve interesting period modifications.
Test every mechanical system you can without driving the car extensively. Does the engine turn over by hand? Check compression if possible. Inspect brake lines for corrosion, fuel lines for cracks, and wiring for deteriorated insulation. Create a master list categorizing needed work as structural (must-do), mechanical (safety-critical), cosmetic (can wait), and missing parts that need sourcing.
Set realistic goals based on this assessment. A car with solid bones but tired paint differs vastly from one needing floor pans, frame repair, and a complete drivetrain rebuild. Match your ambition to your skills, workspace, and budget, or be prepared to expand all three.
Essential Tools, Materials, and Workspace Requirements
A successful classic car restoration demands far more than enthusiasm and elbow grease. You’ll need a carefully assembled collection of tools, quality materials, and a workspace designed to support months or even years of meticulous effort. Setting up properly from the start prevents costly delays and frustration down the line.
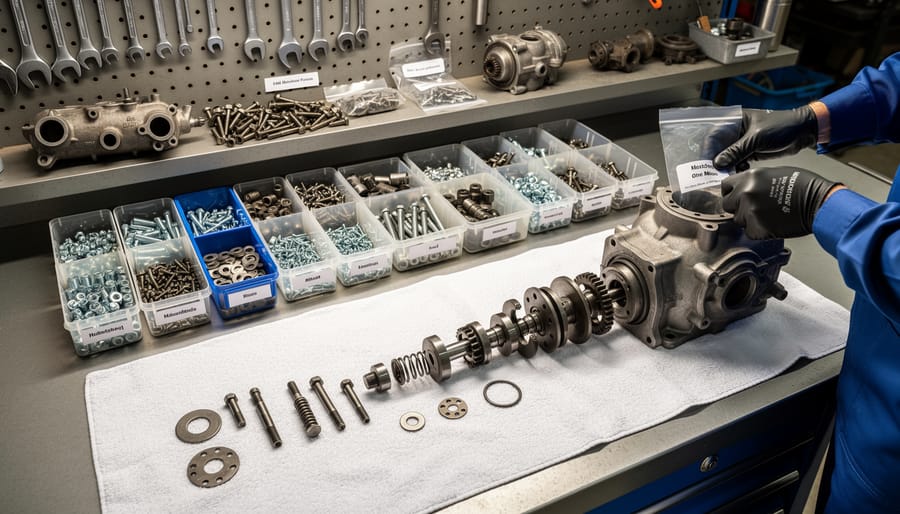
Your tool collection should grow with your project’s phases. Start with quality hand tools: socket sets in both metric and SAE (your classic may use either, depending on origin), combination wrenches, screwdrivers with various tips, pliers, and torque wrenches for precise reassembly. For disassembly and documentation, invest in digital calipers, a camera for reference photos, and countless small containers with labels for organizing fasteners. Bodywork requires specialized equipment including a MIG welder, angle grinder, body hammers and dollies, sanding blocks, and a dual-action orbital sander. Mechanical restoration calls for a proper floor jack rated for your vehicle’s weight, jack stands (never work under a car supported only by a jack), bearing pullers, valve spring compressors, and micrometers for measuring tolerances.
Consider which expensive tools justify purchase versus rental. For a single restoration project, rent sandblasting cabinets, engine hoists, transmission jacks, and possibly a car rotisserie (which lets you rotate the entire body for easier access to the underside). Buy tools you’ll use repeatedly: hand tools, basic power tools, and measurement instruments. Welding equipment sits in the middle: if you plan multiple restorations or have other uses for it, purchase a quality MIG welder; otherwise, renting or hiring a skilled welder for critical structural work makes financial sense.
The tools you’ll need organize naturally by project phase:
- Disassembly phase: hand tools, parts organizers, camera, labels, jack and stands, penetrating oil
- Bodywork phase: welder, grinder, body hammers, sanding equipment, primer, body filler, masking materials
- Mechanical phase: engine stand, torque wrenches, bearing tools, gasket sets, fluids, filters, replacement parts
- Reassembly phase: proper fasteners, torque specifications, trim tools, upholstery materials, detailing supplies
Materials represent an ongoing expense throughout restoration. Quality paint and primer systems designed for automotive use deliver far better results than bargain alternatives. Source correct fasteners rather than using whatever fits; originality matters to collectors, and incorrect bolts or clips stand out. Build relationships with reputable parts suppliers who specialize in your make and model, as reproduction parts vary wildly in quality.
Your workspace determines whether restoration progresses smoothly or becomes a constant battle. You need enough space to completely disassemble the car while storing removed components safely. A two-car garage represents the absolute minimum; larger is always better. Proper ventilation is non-negotiable when working with solvents, paints, and welding fumes. Install adequate lighting, including portable work lights for inspecting tight spaces. Climate control prevents rust on exposed metal and makes year-round work bearable. Dedicate shelving and labeled bins for organized storage; finding that small bracket you removed six months ago shouldn’t require an archaeological dig.
Safety Precautions and Common Hazards
Classic car restoration exposes you to hazards that didn’t exist when these vehicles rolled off the assembly line, and modern safety standards require precautions that weren’t common practice decades ago. Before you begin any work, invest in quality personal protective equipment: chemical-resistant gloves, safety glasses with side shields, steel-toed boots, and an NIOSH-approved respirator rated for organic vapors and particulates. A simple dust mask won’t protect you from paint solvents or metalworking fumes.
Ventilation is non-negotiable when working with strippers, solvents, primers, and paints. Your garage needs active airflow that meets spray facility ventilation limits if you’re applying finishes, not just an open door. Cross-ventilation with intake and exhaust fans prevents vapor buildup that can ignite from a spark or pilot light. Store flammable materials in approved safety cabinets away from heat sources, and keep a BC-rated fire extinguisher within arm’s reach of your work area.
Pre-1978 vehicles almost certainly contain lead paint, which becomes extremely hazardous when sanded or heated. Follow lead-safe renovation requirements by using wet sanding methods, containment sheeting, and HEPA vacuums. Similarly, brake shoes and clutch facings from cars built before the mid-1990s may contain asbestos fibers. The EPA’s best practices for brake work recommend wet cleaning methods and never using compressed air to clean brake assemblies.
Old fuel systems present multiple dangers. Drain tanks outdoors using proper containers, never siphon by mouth, and assume any standing gasoline has formed explosive vapors. Use proper lifting techniques and mechanical assistance for heavy components like engines and transmissions, a back injury can end your restoration permanently. Contact your local hazardous waste facility for proper disposal of old fluids, batteries, and contaminated materials rather than pouring them down drains or into trash bins.
The Step-by-Step Restoration Process
Phase 1: Documentation and Disassembly
Successful restoration begins with methodical disassembly. Before removing a single bolt, photograph the car from every angle, front, rear, both sides, engine bay, undercarriage, and interior. Capture close-ups of how trim attaches, wire routing, linkage positions, and anywhere two parts connect. These photos become your reassembly reference when memory fails months later.
Create a restoration journal in a hardbound notebook or digital format. Record part numbers, paint codes, measurements, and observations about originality. Note every repair you find, every deviation from factory specifications. This documentation proves invaluable when tracking down correct replacement parts and prevents repeating previous mistakes.
- Remove and bag all interior components, seats, door panels, headliner, carpet, photographing fastener locations and labeling each bag with masking tape noting where parts came from.
- Extract all glass and rubber seals, protecting glass in blankets and storing vertically to prevent cracking.
- Strip exterior trim, badges, and chrome pieces, placing hardware in labeled bags taped to the corresponding trim piece.
- Disconnect and remove the wiring harness after photographing every connection and tagging wires with their terminal locations.
- Pull the engine and transmission as a unit after draining fluids and documenting mounting positions.
- Detach suspension components, labeling left and right sides to preserve wear patterns and factory adjustments.
- Remove body panels and fenders only after photographing panel gaps and marking alignment points with a paint pen.
Invest in clear plastic bins, quality ziplock bags, and a label maker. Group fasteners by location, never dump bolts from different areas into one container. Write directly on bags which panel or assembly they belong to. String similar parts together on wire: door hinge bolts, bumper brackets, window cranks. Store small trim clips in tackle boxes with compartments.
Keep disassembled parts in the same area where they’ll be reinstalled when possible, reducing the chance you’ll grab the wrong bolt during reassembly.
Phase 2: Body and Frame Repair

Body and frame repair forms the structural foundation of your restoration. Start by inspecting every inch of the frame and body panels with the car on jack stands or a lift. Tap suspect areas with a small hammer, solid metal rings clearly while rust sounds dull and may crumble. Pay special attention to rocker panels, floor pans, trunk floors, and the area around mounting points where moisture accumulates.
For surface rust on solid metal, wire brushing and treatment with rust converter prepares the surface for primer. When rust has compromised structural integrity, you must cut out the affected section entirely. Mark your cut lines to preserve as much original metal as possible, then use a cutoff wheel to remove the damaged area cleanly.
Decide whether to repair or replace based on availability and originality concerns. Reproduction panels work well for common models, but rare vehicles often require hand-fabricating patches to preserve value. When welding repair panels, use MIG or TIG techniques appropriate for the thin gauge steel found in vintage cars. Overlap seams where factory spot welds existed, replicating original construction methods when feasible.
Frame straightening requires professional equipment and expertise. Minor tweaks can be achieved with hydraulic jacks and measured carefully, but significant damage demands a frame machine to restore proper geometry. Verify alignment by measuring diagonally across multiple reference points and comparing to factory specifications.
Preserve original stampings, VIN plates, and factory markings whenever possible. These identifiers authenticate your vehicle and prove its provenance. When replacing entire panels, photograph stampings first and consider having them transferred by a specialist. This attention to originality pays dividends for both historical accuracy and resale value.
Phase 3: Mechanical Restoration
Mechanical restoration transforms your classic car’s heart and soul, requiring both technical precision and respect for vintage engineering. Begin with the engine, the most complex mechanical component, by completely disassembling it for inspection. Measure all bearing clearances, cylinder bore wear, and crankshaft journals against factory specifications found in the original service manual. Most vintage engines need at minimum new piston rings, bearings, and gaskets, though many require a complete machine shop rebuild including boring, decking, and line honing.
When sourcing parts, decide early whether you’re pursuing a numbers-matching restoration or a reliable driver. Original parts maintain authenticity and value but may be scarce or expensive. Quality reproduction parts are available for popular models like Mustangs and Corvettes, while obscure marques often require salvage yard hunting or custom fabrication. For brake and suspension components especially, modern equivalents often offer superior safety without compromising appearance.
Engine break-in is critical after a rebuild. Use conventional mineral oil, not synthetic, for the first 500 miles to allow rings to properly seat. Vary engine speed during this period and avoid prolonged idling or full throttle. Change oil at 50, 200, and 500 miles to remove metal particles from initial wear.
Set valve lash when the engine is cold, following factory specifications exactly. Vintage solid lifter engines typically require adjustment every 3,000 miles. For timing, use a dial-back timing light and set total advance with a combination of initial setting and mechanical advance curve. Carburetors demand patience: start with the factory baseline jetting, then fine-tune idle mixture screws and float levels. A properly rebuilt carburetor should show smooth acceleration without hesitation or stumbling.
Rebuild transmissions and differentials with fresh seals, bearings, and synchronizers as needed, replacing gear oil with the correct weight and type specified for your car’s era.
Phase 4: Bodywork, Paint Preparation, and Finishing

Getting the bodywork and paint right separates a mediocre restoration from one that turns heads at car shows. This phase demands patience, meticulous surface preparation, and attention to environmental conditions that affect finish quality.
Start with bare metal completely free of rust, old paint, and contaminants. Block-sand the entire body using progressively finer grits, typically 80-grit to remove imperfections, then 180, 320, and finishing with 400-grit before primer. A sanding block or board keeps surfaces flat; your hand alone creates waves you won’t see until paint reveals them. Apply a high-build epoxy primer to seal the metal and provide a foundation for subsequent coats. After the primer cures, wet-sand with 600-grit to eliminate orange peel and minor imperfections, then apply a second primer coat if needed.
The blocking stage is where craftsmen earn their reputation. Using a long sanding board with guide coat (a contrasting colored powder), you’ll identify and eliminate high and low spots that would telegraph through the final finish. This tedious process might require spot putty and multiple primer applications, but skip it and you’ll regret the outcome.
For paint selection, weigh originality against durability. Single-stage enamels match vintage finishes but lack the depth and UV resistance of modern basecoat-clearcoat systems. Many restorers choose period-correct colors in updated formulations. Apply paint in a dust-free environment at 70-75 degrees with proper humidity, temperature swings cause runs, sags, and adhesion failures.
Color coats demand thin, even passes with adequate flash time between coats. Most classics require three to four color coats before clearcoat application. Allow full cure time, typically seven days minimum, before wet-sanding and polishing.
Chrome re-plating transforms pitted bumpers and trim. Send pieces to specialized platers who strip old chrome, repair the base metal, then apply copper, nickel, and chrome layers. Expect 8-12 weeks turnaround and significant cost, but the mirror finish justifies the investment on high-visibility pieces.
Phase 5: Interior, Trim, and Final Assembly
Interior and trim installation transforms your mechanically sound classic into a finished automobile. Begin with sound deadening material on bare metal floors, then install carpets before seats to avoid crushing pile. Pre-fit carpets without adhesive, trimming gradually until they lay flat without wrinkles. Modern reproduction carpets often fit imperfectly and require patient adjustments around transmission tunnels and footwells.
Upholstery work demands precision. If installing reproduction seat covers, stretch them evenly using listing wires and hog rings, working from the center outward to prevent puckering. Dashboards require careful attention to correct fastener types. Phillips screws, slotted screws, and trim clips each serve specific purposes on different manufacturers. Using incorrect fasteners damages mounting holes in irreplaceable pot metal or wood.
Door and panel gaps reveal restoration quality. Adjust striker plates and hinges until doors close with the satisfying thunk of proper alignment, showing consistent three-millimeter gaps top and bottom. Quarter panel and fender gaps require loosening bolts, shimming where necessary, and patience. Check gaps from multiple angles, because what looks correct from one position may appear off from another.
Install trim in reverse order of removal, consulting your disassembly photos. Chrome spears, emblems, and moldings often use hidden clips and specific torque limits. Over-tightening cracks pot metal or distorts thin stainless. Complete weatherstripping last, adjusting door fit one final time before the final test drive reveals any rattles or leaks requiring correction.
Testing, Verification, and Shakedown Process
Completing a restoration and seeing your classic car gleam in the workshop is deeply satisfying, but the real test comes when you fire up the engine and take it on the road. Systematic testing and verification ensure that all your meticulous work translates into a safe, reliable vehicle. This shakedown process reveals issues that only become apparent under operating conditions and gives you the chance to fine-tune adjustments before regular use.
Start with the initial engine startup. Before turning the key, verify that all fluid levels are correct, the battery is charged, and fuel lines show no leaks. Prime the oil system by removing the distributor or disabling the ignition and cranking the engine until oil pressure registers on the gauge. When you’re ready for first start, have a fire extinguisher nearby and watch for fuel leaks, overheating, or unusual sounds. Let the engine idle briefly, then shut it down to check for leaks and verify that cooling fans engage properly. Gradually extend run time over several sessions, monitoring oil pressure, charging voltage, and coolant temperature.
Brake system verification demands particular attention. Bleed all four wheels in the correct sequence, typically starting with the wheel furthest from the master cylinder. Pump the pedal repeatedly to ensure it firms up and holds pressure without sinking. Before driving, test brakes at walking speed in your driveway or an empty lot, confirming that the car stops straight without pulling to either side. Check that parking brakes engage and hold the car on an incline.
Electrical systems require methodical checks. Test every light, gauge, wiper, horn, and accessory. Verify that charging voltage remains steady at idle and under load. Inspect wiring harnesses for hot spots after running the engine, which indicate high resistance connections or undersized wires.
The shakedown period is where you truly learn whether your restoration succeeded. Plan a series of progressively longer drives, starting with a few miles around quiet neighborhoods and building to highway speeds.
- Oil pressure and temperature during warm-up and at operating temperature
- Brake performance, pedal feel, and stopping distance
- Steering response, alignment, and tracking
- Clutch engagement and transmission shifting smoothness
- Suspension behavior over bumps and during cornering
- Electrical charging system voltage under various loads
- Exhaust leaks, unusual vibrations, or rattles
- Fuel system pressure and carburetor tuning at different speeds
After each drive, inspect the car thoroughly. Look underneath for fresh fluid leaks, check lug nut torque, and note any new sounds or handling quirks. Many vintage cars need carburetor adjustments after initial break-in as engine tolerances settle. Valve lash may require rechecking after the first hundred miles.
Keep a detailed logbook of all tests, adjustments, and observations. Record mileage, operating temperatures, any issues discovered, and corrections made. This documentation proves invaluable when troubleshooting recurring problems and establishes a maintenance baseline. It also adds significant value if you ever sell the car, demonstrating that the restoration was properly commissioned and sorted. The shakedown period typically spans 500 to 1,000 miles, giving enough time for initial break-in and revealing any workmanship issues while they’re still fresh enough to address efficiently.
Common Challenges and How to Overcome Them
Even the most meticulous restoration hits roadblocks. Knowing what to expect and how to respond separates stalled projects from successful ones.
Sourcing rare or discontinued parts challenges nearly every restorer. Original equipment manufacturers stopped producing many components decades ago. Start by joining marque-specific clubs and online forums where members often know which parts interchange across model years or who reproduces quality replacements. Companies like Year One, Classic Industries, and Hemmings Motor News maintain extensive catalogs of reproduction parts. For truly scarce items, establish relationships with parts suppliers who specialize in your make, attend swap meets with a detailed shopping list, and consider having critical parts custom fabricated by machine shops experienced with vintage specifications.
Previous botched repairs complicate restoration more than original damage. Amateur bodywork, incorrect fasteners, and non-original modifications waste time and money to reverse. When you discover spray foam in cavities, household screws in trim, or thick body filler, strip everything back to bare metal and do it correctly. Document these issues as you find them to avoid surprises and adjust your timeline accordingly.
Scope creep destroys budgets and timelines. You intended to repaint, but now you’re replacing floor pans and rebuilding the carburetor. Set firm boundaries for your current phase and keep a separate list of additional work to address later or in a future project. Review your budget monthly and be honest when costs exceed your limit.
Maintaining motivation through a multi-year project requires breaking the work into achievable milestones. Celebrate completing each phase, even small ones. Connect with other restorers online or at local car shows to share progress and draw inspiration from their finished builds.
Frequently Asked Questions
Restoring a classic car raises many questions, especially for those new to the process. These answers address the concerns collectors most frequently encounter when planning and executing a restoration project.
How long does a complete classic car restoration take?
A full ground-up restoration typically requires 1,000 to 2,000 hours of work, translating to one to three years for hobbyists working evenings and weekends. Professional shops can complete projects in six months to a year depending on parts availability and workload.
Should I restore the car myself or hire professionals?
Your decision depends on your skill level, available time, and budget. Many collectors handle disassembly, mechanical work, and reassembly themselves while outsourcing specialized tasks like paint, upholstery, and chrome plating to professionals. This hybrid approach balances cost control with quality results.
How much should I budget for a classic car restoration?
Entry-level restorations of common models start around 15,000 to 25,000 dollars for parts and outsourced work, while high-end concours restorations easily exceed 100,000 dollars. Factor in 20 to 30 percent more than your initial estimate to cover unexpected issues and parts sourcing challenges.
Does maintaining originality affect resale value?
Original, numbers-matching components command premium prices in the collector market, particularly for rare or high-performance models. However, tasteful period-correct upgrades like radial tires or electronic ignition rarely hurt value if the original parts are included with the sale.
The timeline question surprises many newcomers who underestimate the work involved. Patience matters more than speed. A rushed restoration shows in the final product, while methodical attention to detail creates a car you’ll proudly drive for decades.
Documentation becomes crucial if you ever sell. Keep receipts for all parts and services, photograph each phase of work, and maintain a restoration journal noting what you did and when. Buyers pay more for well-documented restorations because they understand exactly what they’re purchasing and can verify the quality of work performed.
Restoring a classic car transforms metal and mechanics into a living piece of automotive history. The techniques you’ve learned here, from that crucial initial assessment through systematic disassembly, metalwork, mechanical rebuilding, and finishing, form the foundation for bringing vintage vehicles back to life. You’ll face challenges and moments of frustration, but each completed phase builds both your skills and your connection to the car.
Every restoration preserves something irreplaceable. The 1967 Mustang you’re bringing back isn’t just another car; it’s a tangible link to the era that created it. By maintaining originality where possible and documenting your work thoroughly, you’re contributing to automotive heritage that future generations will appreciate.
Start with that assessment. Document everything. Join local car clubs and online forums where experienced restorers share hard-won knowledge and help source impossible-to-find parts. Don’t rush the process, classic car restoration rewards patience and attention to detail far more than speed.
Once complete, your restored classic will need regular maintenance to preserve your investment of time and resources. Drive it, enjoy it, and share it with others who appreciate automotive craftsmanship. That’s when restoration truly becomes rewarding.